

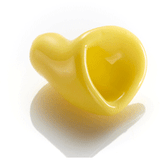




Your custom earplugs sit in one of the most wax-prone, moisture-prone parts of your body. Whether you wear them on a noisy worksite, behind a drum kit, on the motorbike or to get some sleep, regular care protects more than their appearance. Knowing how to clean custom earplugs properly helps maintain a comfortable seal, keeps sound filters working as intended and extends the life of a premium hearing protection investment.
A quick clean after use takes very little time. The key is to treat your earplugs according to their design. Solid custom silicone plugs can generally handle a little more washing than filtered musician or industrial plugs, where moisture and cleaning products can affect the filter components.
Why cleaning custom earplugs matters
Earwax, sweat, skin oils, dust and sunscreen can build up on custom earplugs surprisingly quickly. Left there, this residue can make the surface tacky, affect the fit and transfer back into your ear canal. It may also block small acoustic channels or filters, changing the level or quality of sound reduction.
For workers, that matters because protection only performs properly when the earplug seals consistently. For musicians and venue staff, blocked filters can make music sound dull or uneven. For sleep and travelling users, a rough or dirty surface can turn an otherwise comfortable plug into something you stop wearing.
Cleaning is also a chance to inspect your earplugs. A split edge, distorted shape or loose filter is easier to deal with early than after it has compromised your protection.
How to clean custom earplugs in five careful steps
1. Start with clean, dry hands
Wash and dry your hands before handling the earplugs. This sounds basic, but it prevents you from adding hand cream, grime or bacteria to the very surface you are trying to clean. Take each plug out by its outer section or removal handle, rather than digging a fingernail into the canal portion.
If you have left and right earplugs, keep track of them as you clean. Many custom sets are marked with a red dot for right and blue for left, but this can vary.
2. Wipe away surface debris first
Use a soft, lint-free cloth or a clean tissue to remove visible wax and moisture. For wax sitting in a shallow groove, use the cleaning tool supplied with your earplugs, if one was provided. Work gently and only on the outside surface.
Do not push a pin, toothpick, paper clip or cotton bud into a sound bore, vent or filter opening. These can damage delicate parts, force wax deeper into the channel or alter the earplug's acoustic performance.
3. Wash solid silicone plugs with mild soap
If your custom earplugs are solid silicone models with no acoustic filters, electronics or removable components, wash them in lukewarm water with a small amount of mild, fragrance-free soap. Rub the surface gently with your fingertips, paying attention to the canal tip and the contours that sit in the outer ear.
Rinse thoroughly. Soap residue can irritate sensitive skin and make the plug slippery. Avoid hot water, which is unnecessary and can be harsher on materials over time.
This approach is often suitable for custom sleep plugs, swimming plugs and some industrial plugs, but always follow the care instructions supplied with your specific model.
4. Treat filtered earplugs differently
Filtered earplugs, including models used for music, motorsports and variable workplace noise, need more caution. The silicone shell may be wipe-cleaned with a barely damp cloth, but the filter should not be soaked, rinsed under a tap or exposed to cleaning fluid unless the manufacturer explicitly says it is washable.
If your model is designed with removable filters, take them out only if the instructions allow it. Clean the silicone shell separately, keep the filters dry and reinstall them only when the earplugs are completely dry. If you are unsure whether a component can be removed, leave it in place and use a dry cloth around it.
5. Let them dry completely before storage
Pat the plugs dry with a clean lint-free cloth, then leave them in a clean, well-ventilated spot until fully dry. Do not place them on a heater, in direct sun or use a hairdryer. High heat can affect silicone and may damage filters or other fitted components.
Once dry, return them to their protective case. A case protects the earplugs from dust, being crushed in a work bag or rolling around in a ute console. If the case becomes dusty or sticky, wash and dry it too.
What not to use on custom earplugs
Strong cleaners may look like the quickest fix, but they can leave residues, dry out materials or damage filters. Keep the following away from your custom earplugs unless your manufacturer specifically approves them:
- alcohol wipes, hand sanitiser and disinfectant sprays
- bleach, peroxide and harsh household cleaners
- solvents, acetone, petrol or degreasers
- abrasive brushes, scouring pads and sharp objects
- boiling water, dishwashers and heat sources.
How often should you clean them?
For most people, a dry wipe after every wear and a more thorough clean once a week is a sensible routine. If you wear your plugs daily on site, at the gym, while riding or for sleep, you may need to clean them more often. Earwax production varies widely, so the practical test is simple: clean them whenever you can see residue, feel a change in comfort or notice blocked sound openings.
Swimming earplugs should be rinsed and dried after each use, provided they are plain water-protection plugs without filters. Earplugs used for live music or industrial work may need frequent surface cleaning, but their filters should stay dry unless their instructions say otherwise.
Avoid sharing custom earplugs. They are shaped for one person's ears and are not hygienic to pass around, even after cleaning.
When cleaning is not enough
A clean earplug should feel smooth, retain its original shape and sit comfortably without needing to be forced into place. If it has become hard, cracked, torn, permanently misshapen or loose in your ear, it needs professional assessment or replacement.
The same applies if a filtered plug suddenly sounds muffled, unusually quiet or inconsistent between ears after you have removed visible wax. A blocked or damaged filter may need specialist cleaning or replacement. Do not continue using compromised hearing protection in high-noise environments and assume it is providing its rated level of protection.
Fit can also change over time. Weight changes, dental work, jaw changes and the natural shape of the ear canal can all affect how a custom earplug seals. If your plugs no longer feel secure, an ear impression and refit may be the safer option.
Make care part of your hearing protection routine
The best time to clean custom earplugs is straight after use, before wax and sweat have time to dry on the surface. Keep a soft cloth in your earplug case or work bag, check the plugs under good light once a week and store them somewhere cool and protected.
Custom hearing protection is built to offer lasting comfort and reliable reduction in the environments that put your hearing at risk. A few careful minutes of maintenance helps ensure your earplugs are ready when the workshop, crowd, engine or early-morning flight gets loud again.